Crafting a Customized DIY Dog Leash

Making your own DIY dog leash can be a fun and creative project that allows you to personalize your pet’s accessories. With just a few materials and some basic sewing skills, you can create a customized leash that reflects your pet’s style. Whether you want to match a collar or simply add a personal touch to your daily walks, crafting a DIY dog leash is a rewarding and budget-friendly option.
If you enjoy handmade accessories and pet crafts, making a DIY dog leash is the perfect project for you. Not only will you have the satisfaction of creating something unique for your furry friend, but you can also save money by making it yourself. Plus, the process of crafting a DIY dog leash allows you to unleash your creativity and design a leash that perfectly suits your pet’s personality.
In the following sections, we will guide you through the materials and tools you’ll need, provide step-by-step instructions, and offer tips for customizing your DIY dog leash. Get ready to embark on a crafting journey that will leave tails wagging!
Materials and Tools for DIY Dog Leash
To make a DIY dog leash, you will need some basic materials and tools. The main components include fabric, a nylon webbing strap, and a quick-release catch. Let’s take a closer look at each of these:
Fabric
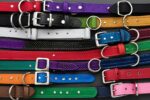
The fabric you choose for your DIY dog leash should be a tightly woven cotton material. You can opt for a fun print or a plain design, depending on your pet’s style. It’s important to choose a fabric that is durable and comfortable for your furry friend.
Nylon Webbing Strap
The nylon webbing strap is an essential part of your DIY dog leash. It provides strength and stability to the leash. Make sure to select a webbing strap that is at least 1 inch wide to ensure durability. You can find nylon webbing straps in various colors to match your fabric choice.
Quick-Release Catch
The quick-release catch is a convenient feature that allows you to easily attach and detach the leash from your pet’s collar. Look for a quick-release catch that is sturdy and secure. It should be easy to operate with one hand but strong enough to withstand your pet’s movements.
Sewing Supplies
In addition to the main components, you will need a few sewing supplies to bring your DIY dog leash to life:
- Sewing clips: These handy clips will help hold your fabric in place during the sewing process.
- Scissors or rotary cutter: Use these tools to cut your fabric and webbing strap to the desired lengths.
- Ruler or measuring tape: Accurate measurements are essential for creating a well-fitting leash.
- Iron and ironing board: Ironing your fabric and webbing strap will ensure a clean and professional finish.
- Matching polyester thread: Choose a thread color that complements your fabric for a seamless look.
Optional supplies that can enhance your DIY dog leash making experience include fusible interfacing for added stability and Wonder Clips for securing the fabric during sewing.
Now that you have a list of materials and tools, you’re ready to move on to the next section and learn how to sew your own DIY dog leash.
Step-by-Step Guide to Sewing a DIY Dog Leash
Creating your own DIY dog leash is a rewarding and fun project that allows you to customize your pet’s accessories. Follow these step-by-step instructions to sew a unique leash for your furry friend. Don’t forget to refer to the accompanying video tutorial for visual guidance.
Determining the Leash Length
Before you start sewing, decide on the length of the leash based on your preferences and the size of your dog. Popular standard leash lengths include 4 feet, 6 feet, and 8 feet. Choose the length that suits your needs and provides ample freedom for your pet.
Cutting the Fabric and Webbing Strap
Once you’ve determined the leash length, cut the fabric and nylon webbing strap to the appropriate sizes. Ensure that the fabric is tightly woven and the webbing strap is at least 1 inch wide for durability. Remember to seal the cut edges of the webbing to prevent fraying.
Optional: Adding Fusible Interfacing
If desired, you can add fusible interfacing to the wrong side of the fabric for added stability. Iron the interfacing onto the fabric according to the manufacturer’s instructions before proceeding to the next step.
Folding, Pressing, and Sewing
Now it’s time to assemble the leash. Fold and press the fabric in half lengthwise with the right sides facing each other. Insert the webbing strap between the folded fabric, aligning it with the raw edges. Secure the layers together with sewing clips.
Next, sew around the edges, leaving a small opening to turn the leash right side out. Trim any excess fabric or thread and turn the leash through the opening. Press the leash flat with an iron, ensuring that the edges are crisp and well-defined.
Attaching the Quick-Release Catch
To create a secure closure for your leash, attach a quick-release catch to one end. Follow the manufacturer’s instructions for proper installation. This catch allows you to easily clip and unclip the leash from your pet’s collar.
Creating a Handle and Reinforcing Stitches
To complete your DIY dog leash, fold the opposite end of the leash to create a handle. Sew across the folded edge, reinforcing the stitches for added strength. Double-check that all the seams are secure and that the leash can withstand the pulling and tugging that may occur during walks.

And there you have it – your very own DIY dog leash! Give it a test run with your furry companion, and enjoy the satisfaction of crafting a leash that’s personalized and unique. With these step-by-step instructions and the accompanying video tutorial, you’ll be able to sew a leash that’s both functional and stylish in no time.
Customizing Your DIY Dog Leash
One of the great advantages of making a DIY dog leash is the opportunity to customize it according to your preferences and your pet’s style. You can choose from a wide range of fabric options, including fun prints and patterns that reflect your pet’s personality.
Additionally, you can add embellishments or tags to make the leash even more unique. Consider adding a “Made with Love” tag or attaching fun charms to the leash for a personalized touch. Let your creativity shine and create a leash that stands out from store-bought options.
Fabric Options:
When it comes to fabric options for your DIY dog leash, the possibilities are endless. You can choose fabrics that match your pet’s personality or complement their coat color. Some popular fabric options include:
- Cotton prints with cute animal designs
- Vibrant patterns for a pop of color
- Denim for a durable and rugged look
- Soft and comfortable fleece for colder months
Embellishments:
Adding embellishments to your DIY dog leash is a fantastic way to personalize it and make it truly one-of-a-kind. Consider the following embellishments:
- Charms and tags: Attach small decorative charms or personalized dog tags to the leash.
- Embroidery: Add your pet’s name or a special message using embroidery techniques.
- Bows and ribbons: Attach bows or ribbons in coordinating colors for a cute and feminine touch.
- Pom-poms: Attach small pom-poms to the leash for a playful and colorful accent.
Pet owners love the freedom of choice that comes with making their own dog leashes. From fabric selection to embellishments, you have complete control over the final look. It’s a wonderful opportunity to showcase your personal style and create a leash that truly reflects your pet’s individuality.
Not only does customizing your DIY dog leash allow you to create something unique, but it also provides a chance to bond with your pet. The process of crafting a personalized leash can be a fun and rewarding activity for both of you. Plus, when you’re out for walks, you’ll be proud to showcase the leash you made with love.
Benefits of DIY Dog Leashes
Crafting your own dog leash offers several benefits. First and foremost, it is a budget-friendly alternative to purchasing a leash from a store. You can save money by using affordable materials and avoiding high-end prices.
In addition to being budget-friendly, DIY dog leashes can also be more durable. When you make your own leash, you have control over the quality of the materials and construction. This allows you to create a leash that is built to withstand your pet’s activities, ensuring it lasts longer than store-bought options.
But the benefits don’t stop there – crafting a DIY dog leash also allows you to unleash your creativity. You can choose from a variety of fabrics, patterns, and colors to create a unique and personalized accessory for your furry friend.
Lastly, DIY dog leashes are a sustainable choice. If the fabric on your leash wears out over time, you can simply disassemble it and make a new covering. This reduces waste and promotes a more environmentally friendly approach to pet accessories.

Crafting your own dog leash not only saves money but also allows you to create a durable, creative, and sustainable accessory that perfectly suits your pet’s personality.
Tips for Making DIY Dog Leashes
When it comes to crafting DIY dog leashes, there are some valuable tips to keep in mind for successful results. These tips will help you create a leash that not only looks great but also ensures the safety and comfort of your furry friend.
Create a Matching Leash and Collar Set
If you want to achieve a coordinated and stylish look, consider making a matching leash and collar set using the same fabric or complementary fabrics. This creates a cohesive ensemble that showcases your pet’s unique style. Whether you opt for a bold pattern or a subtle design, a matching set adds an extra touch of charm to your walks together.
Pay Attention to Safety Considerations
Safety is a top priority when making DIY dog leashes. Be sure to choose a strong and durable quick-release catch that can withstand your dog’s movements. Additionally, reinforcing the stitches will provide added security, preventing them from coming loose during walks or playtime. Using sturdy materials that can withstand your dog’s strength and energy is also crucial to ensure the longevity of your leash.
Experiment with Fabric Options and Embellishments
Don’t be afraid to get creative and experiment with different fabric options and embellishments to make your DIY dog leash truly unique. Consider using a fabric that suits your pet’s personality or reflects your own style preferences. You can also add decorative elements such as ribbons, tags, or charms to give your leash a personalized touch. Let your imagination run wild and have fun customizing your leash!
By following these tips, you can create a DIY dog leash that not only matches your pet’s collar but also meets your safety standards and showcases your creativity.
Where to Find DIY Dog Leash Inspiration
If you’re in need of inspiration for your DIY dog leash project, there are several resources available. Pet craft blogs, online tutorials, and social media platforms are excellent sources to explore for ideas and guidance in creating custom pet accessories.
Pet Craft Blogs
Pet craft blogs and websites are a treasure trove of tutorials, tips, and techniques for crafting unique and personalized pet accessories. These blogs often feature step-by-step guides, detailed instructions, and stunning visual examples to inspire your DIY dog leash project. You can learn new sewing techniques, discover fabric options, and find creative ideas to make your dog’s leash truly one-of-a-kind.
Online Tutorials
Online tutorials and video guides provide an immersive learning experience for DIY enthusiasts. These resources offer comprehensive instructions, from choosing the right materials to sewing techniques and decorative embellishments. Whether you prefer written tutorials or prefer watching videos, online platforms cater to various learning styles and skill levels. You can follow along at your own pace, pause and rewind as needed, ensuring a seamless crafting process.
Social Media
Social media platforms such as Pinterest and Instagram are incredible sources of inspiration for DIY dog leashes. By following relevant hashtags and accounts, you can browse through countless images and videos shared by pet owners and crafters all over the world. You’ll find a multitude of unique leash designs, color combinations, and creative ideas to spark your imagination. Additionally, these platforms create communities where you can interact with other pet lovers and receive feedback on your own projects.
Remember to explore a variety of pet craft blogs, online tutorials, and social media platforms to gather a diverse range of ideas and inspiration. This will allow you to find the style and design that resonates best with you and your furry friend.
| Resource | Description |
|---|---|
| Pet Craft Blogs | Online platforms featuring tutorials, tips, and inspiration for creating custom pet accessories. |
| Online Tutorials | Articles and videos providing step-by-step instructions and demonstrations for making DIY dog leashes. |
| Social Media | Pinterest, Instagram, and other platforms where pet owners and crafters share their creations and ideas. |
With the wealth of resources available, you’ll never run out of inspiration for your DIY dog leash projects. Get ready to unleash your creativity and create a personalized leash that will make your furry friend the talk of the town!
Conclusion
Crafting a customized DIY dog leash is a fun and fulfilling project that allows you to demonstrate your creativity while providing your pet with a personalized accessory. By making your own leash, you can save money and create a durable, one-of-a-kind product that reflects your pet’s style. This hands-on approach to pet accessories also promotes a more sustainable lifestyle.
With the step-by-step instructions and inspiration available, creating a DIY dog leash is easier than ever. You can choose from a variety of materials, fabrics, and embellishments to make a leash that perfectly matches your pet’s personality. Whether you prefer a vibrant print or a more minimalist design, the possibilities are endless.
Embrace the DIY spirit and take pride in crafting a leash that not only stands out from store-bought options but also showcases your crafting skills. Start your DIY journey today and enjoy the rewarding process of making a customized leash for your furry friend. Your DIY dog leash will not only be a practical accessory but also a testament to the bond you share with your beloved pet.
FAQ
What materials do I need to make a DIY dog leash?
To make a DIY dog leash, you will need fabric, a nylon webbing strap, a quick-release catch, sewing clips, scissors or a rotary cutter, a ruler or measuring tape, an iron and ironing board, and matching polyester thread. Optional supplies include fusible interfacing and Wonder Clips.
What are the steps to sewing a DIY dog leash?
Follow these steps to sew a DIY dog leash: determine the desired leash length, cut the fabric and webbing strap to the appropriate lengths, fold and press the fabric, insert the webbing, sew around the edges to secure them, attach the quick-release catch, create a handle, and reinforce the stitches.
How can I customize my DIY dog leash?
You can customize your DIY dog leash by choosing from a wide range of fabric options, adding embellishments or tags, and experimenting with different designs. Consider making a matching leash and collar set or attaching personalized charms.
What are the benefits of making a DIY dog leash?
Making a DIY dog leash is budget-friendly, allows for more durability and control over materials, provides a unique and personalized accessory, and promotes a sustainable approach to pet accessories.
What tips should I consider when making DIY dog leashes?
When making DIY dog leashes, consider making a matching leash and collar set, paying attention to safety considerations, and experimenting with different fabric options and embellishments to suit your pet’s style and needs.
Where can I find inspiration for my DIY dog leash project?
You can find inspiration for your DIY dog leash project by exploring pet craft blogs, websites, social media platforms like Pinterest and Instagram, and online tutorials and video guides that provide step-by-step instructions and creative ideas.