Personalized Homemade Dog Collars: A DIY Guide
Making your own homemade dog collars can be a fun and rewarding DIY project. With just a few supplies and some basic sewing skills, you can design unique pet fashion that showcases your crafting skills.
In this DIY guide, we’ll walk you through the process of creating homemade dog collars that are customized to your dog’s size and style.
Choosing the Right Materials
To create your homemade dog collar, you’ll need to gather the right materials. Start with a durable nylon webbing for the base of the collar. This nylon webbing provides strength and stability to ensure the collar will withstand your dog’s adventures.
Next, choose a fabric that reflects your dog’s personality and your unique crafting style. Look for fabrics that are comfortable, washable, and durable to ensure your dog’s comfort and long-lasting wear.
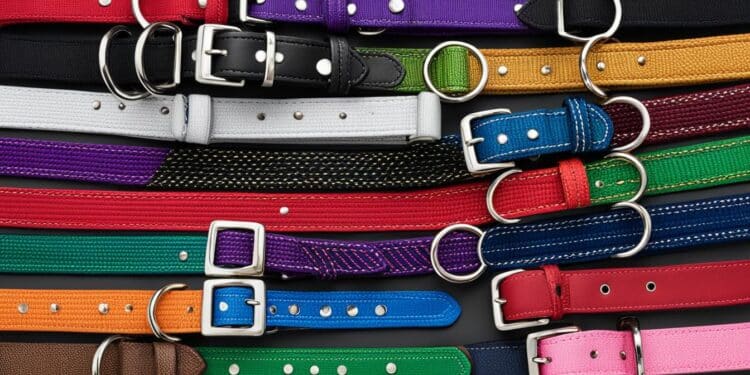
Don’t forget about the necessary hardware to complete your collar design. You’ll need buckles to secure the collar around your dog’s neck and slide adjusters to achieve the perfect fit. Additionally, D-rings are essential for attaching identification tags or a leash, while strap adjusters allow for easy adjustments to the collar’s length.
Fabric Options for Homemade Dog Collars
| Material | Advantages | Disadvantages |
|---|---|---|
| Nylon | Durable, easy to clean, wide variety of colors and patterns | May not be as comfortable as other fabric options |
| Cotton | Soft, breathable, comfortable | May not be as durable as nylon |
| Leather | Durable, stylish, ages well | Requires special care and cleaning |
Consider the options above when selecting the fabric for your homemade dog collar. Each material offers unique advantages, so choose the one that best suits your preferences and your furry friend’s needs.
Measuring and Cutting the Collar
Before you start sewing your personalized homemade dog collar, it’s essential to measure your furry friend’s neck size accurately. A proper fit ensures comfort and safety for your beloved pet. Follow these steps to measure and cut the collar:
-
Using a measuring tape, wrap it around your dog’s neck at the base where the collar will sit. Make sure the tape is snug but not too tight.
-
Take note of the measurement in inches or centimeters. This measurement will be the length of the collar webbing.
-
To allow for adjustments and the attachment of hardware, add a few extra inches to the measured length. This ensures a comfortable fit and makes it easier to put on and take off the collar.
-
With the final measurement in hand, cut the nylon webbing to the appropriate length. The webbing provides the strength and durability for the collar.
-
Next, choose a fabric strip that complements your dog’s style and personality. Ensure that the fabric strip is wider than the webbing to fully cover it when sewing.
-
Cut the fabric strip to match the length of the webbing, keeping in mind the added inches for adjustability.
Once you have measured and cut the collar, you’re ready to move on to the sewing and assembly process. Creating a collar that fits your dog perfectly ensures comfort and style in one paw-some accessory!
Sewing and Assembling the Collar
With your materials cut to size, it’s time to start sewing. Follow these steps to create a sturdy and stylish homemade dog collar:
- Fold the fabric strip in half lengthwise and press to create a clean edge.
- Then, fold each half of the fabric strip down to the center fold and press again.
- Insert the nylon webbing into the fold of the fabric and use Wonder Clips to secure all layers together.
- Use a sewing machine and a jeans foot with reflective thread to topstitch along the long sides of the collar, securing the fabric to the webbing.
- Finally, add the hardware – D-rings, buckles, and strap adjusters – and stitch through all layers to secure everything in place.
By following these steps, you’ll create a professionally sewn dog collar that is durable and secure. The topstitching ensures that the fabric stays in place, while the hardware provides a secure closure for your furry friend.

Now you’re ready to move on to the final step – adding personalized touches to your homemade dog collar.
Adding Personalized Touches
Now that your homemade dog collar is complete, it’s time to add those special personalized touches that will make it stand out. By attaching custom tags and adding fabric bows or other embellishments, you can create a collar that is unique to your furry friend.
Consider attaching custom tags with your dog’s name or a special message. These tags not only add a personal touch but also provide important identification information in case your dog gets lost. Choose from a variety of shapes, sizes, and materials to find the perfect tag that matches your dog’s personality.

If you’re feeling crafty, you can also create fabric bows or other decorative elements to attach to the collar. Use fabric that matches your dog’s collar or opt for contrasting colors and patterns for a fun and eye-catching look. These fabric bows are not only stylish but also add a touch of flair to your dog’s collar.
When adding these embellishments, make sure to securely attach them to the collar to prevent them from easily falling off. Consider using strong threads or adhesives that are safe for pets. It’s also important to regularly check the attachments to ensure they remain in place and don’t pose any risks to your dog.
Remember, the goal of these personalized touches is to make your dog’s collar truly unique and reflective of their personality. Have fun with the process and get creative with different designs and materials. Your personalized dog collar will not only make a fashion statement but also showcase your love and care for your furry companion.
Conclusion
Creating homemade dog collars is a rewarding DIY project that allows you to showcase your crafting skills while providing your furry friend with a personalized accessory. By following this homemade dog collar DIY guide, you can design collars that reflect your dog’s unique personality and style.
Start by gathering the right materials, such as durable nylon webbing, comfortable fabric, and essential hardware like buckles and D-rings. Take accurate measurements of your dog’s neck size before cutting the materials to the appropriate length. Sewing and assembling the collar is a straightforward process, and topstitching ensures a secure and professional finish.
Once your homemade dog collar is complete, it’s time to add personalized touches. Consider attaching custom tags with your dog’s name or a special message, or create fabric bows and other embellishments to enhance the style. Let your creativity shine through as you design a collar that is truly unique for your beloved pet.
So, gather your supplies, unleash your creativity, and start designing personalized pet fashion today. Follow this homemade dog collar DIY guide, and enjoy the satisfaction of crafting something special for your furry companion.
FAQ
What materials do I need to make a homemade dog collar?
To make a homemade dog collar, you will need durable nylon webbing for the base, fabric to reflect your dog’s personality, and various hardware such as buckles, slide adjusters, D-rings, and strap adjusters.
How do I measure and cut the collar for my dog?
To measure the collar, use a measuring tape to measure your dog’s neck size and add a few extra inches for the hardware. Cut the nylon webbing and fabric strip to the appropriate length, ensuring the fabric strip is wider than the webbing for complete coverage.
What sewing techniques should I use to assemble the collar?
Fold the fabric strip in half lengthwise and press to create a clean edge. Then, fold each half of the fabric strip down to the center fold and press again. Insert the nylon webbing into the fold of the fabric and use Wonder Clips to secure all layers together. Topstitch along the long sides of the collar using a sewing machine and a jeans foot with reflective thread. Finally, stitch through all layers to secure the hardware in place.
Can I personalize the homemade dog collar?
Yes, you can add personalized touches to the collar. Consider attaching custom tags with your dog’s name or a special message. You can also create fabric bows or other embellishments to add a touch of style.
Why should I make homemade dog collars instead of buying them?
Making homemade dog collars allows you to showcase your crafting skills and create a personalized accessory for your furry friend. You can design collars that reflect your dog’s personality and style, giving them a unique and special accessory.