Making a DIY Dog Car Seat Cover for Travel
Traveling with your furry friend can be a fun and rewarding experience, but it’s essential to ensure their safety and comfort during the journey. One way to protect your car’s upholstery and provide a cozy space for your pet is by making a DIY dog car seat cover. Not only will this save you money, but it also allows you to customize the size and design to fit your car and your dog perfectly.
Creating a DIY dog car seat cover may seem daunting, but with our step-by-step instructions, it’s easier than you think. By following this guide, you can make a safe, comfortable, and easy-to-maintain car hammock that will keep your pet secure and your car clean during road trips, vet visits, and other outings.
<!—->
Our instructions will walk you through the materials and measurement process, the step-by-step construction, and even provide tips for customizations to suit your preferences. With a little time and effort, you’ll have a DIY dog car seat cover that not only protects your car but also ensures your pet’s safety and comfort on every adventure.
Materials and Measurements
To make a DIY dog car seat cover, you’ll need the following materials:
- Acrylic, polyester, polyolefin, or olefin outdoor-safe upholstery fabric with high abrasion and stain resistance
- Sunbrella® Acrylic Binding 1″ Toast
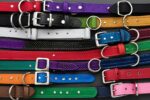
- Polyester or Polypropylene Webbing 1″ Black
- YKK® Side Release Buckle Black 1″
- Scissors or the Sailrite® Edge Cordless Hotknife
- Thread Tex 70 Black Polyester UV
- Tempered Cutting Glass for Hotknife
- Sewing Machine
- Marking Pencil
- Tape Measure
- Sailrite® Battery Operated Thread Burner
- Sailrite® 1″ Swing-Away Binder
Once you have gathered these materials, you’ll be ready to start creating your DIY dog car seat cover. The upholstery fabric provides durability and protection, while the webbing, buckles, and binding help secure the cover in place during travel. A sewing machine and other tools will aid in the construction process, ensuring a professional finish.

Step-by-Step Instructions
Creating your own DIY dog car seat cover is a simple and rewarding project. Follow these step-by-step instructions to make a custom-fit cover for your furry friend:
- Measurements: Start by measuring the length and width of your car’s backseat. Then, measure the distance from the bottom of the backseat headrest to the bottom of the front seat headrest in a U shape. These measurements will ensure a perfect fit for your car seat cover.
- Cutting Fabric: Using these measurements, cut your chosen fabric to size. Remember to leave a 2-inch seam allowance on the edges to account for stitching.
- Sewing the Edges: To prevent fraying, it’s important to finish the edges of the fabric. You can use a hotknife to seal the edges or fold them over and sew them in place.
- Webbing Loops: Mark the placement of your car’s headrests on the fabric. Then, sew four webbing loops in a U shape to attach the cover to the headrests. Use a box X stitch to ensure durability.
- Adding Buckles: If desired, you can add buckles to the webbing loops for extra security. Attach the buckles to the ends of the webbing and sew them together using a box X stitch.
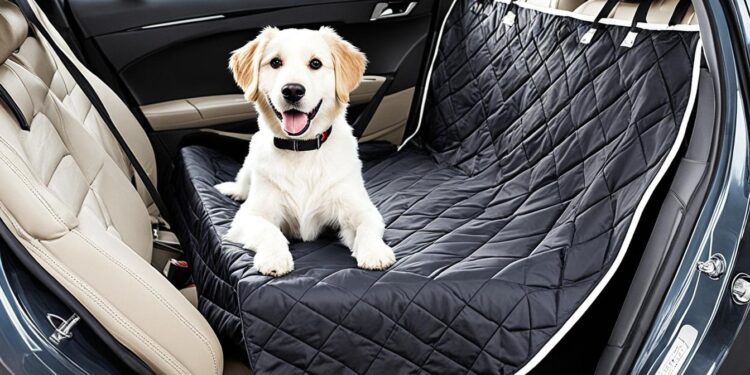
- Fitting the Cover: Now it’s time to fit the DIY dog car seat cover onto your car’s backseat. Secure it in place using the webbing loops and buckles. Trim any excess fabric if necessary for a tidy finish.
By following these straightforward instructions, you’ll have a custom-made DIY dog car seat cover that provides comfort, protection, and peace of mind during your travels.

Helpful Tips:
- Choose the right fabric: Select a fabric that is durable, easy to clean, and resistant to stains. Outdoor-safe upholstery fabrics are a great choice.
- Double-layer for extra padding: For added comfort, consider sewing old towels or polyester batting between two layers of fabric. This will create a double-layered hammock for your dog.
Tips and Customizations
When making a DIY dog car seat cover, consider the following tips and customizations:
- Choose a fabric with high abrasion resistance and stain resistance to withstand wear and tear from your pet. Look for upholstery fabrics made of acrylic, polyester, polyolefin, or olefin, which are outdoor-safe and have excellent durability.
- Add extra padding by sewing old towels or polyester batting between two layers of fabric for a double-layered hammock. This will provide extra comfort for your dog during car rides and help protect your car’s seats from scratches.
- Share photos of your finished DIY dog car seat cover in the comments or on social media to inspire others and show off your creativity. By sharing your creation, you can also connect with other pet owners and exchange ideas for fabric selection, design, and other tips.
By following these tips and exploring customizations, you can create a DIY dog car seat cover that not only serves its function but also reflects your style and personality.
Conclusion
Making a DIY dog car seat cover is a practical and cost-effective solution for pet owners who want to protect their car’s upholstery while traveling with their furry friends. By following the step-by-step instructions and considering the tips and customizations, you can create a custom-fit car hammock that ensures the safety and cleanliness of your car while enjoying road trips, vet visits, and other outings with your beloved pet.
A DIY dog car seat cover allows you to tailor the size and design to fit your car and your dog perfectly. With the right materials, such as high abrasion and stain-resistant upholstery fabric, along with webbing loops and buckles for added security, you can create a comfortable and secure space for your pet during car rides.
Not only does a DIY dog car seat cover protect your car’s seats from dirt, fur, and scratches, but it also provides a dedicated space for your pet, reducing the likelihood of them becoming a distraction while driving. By adding extra padding or using a double-layered fabric design, you can further enhance the comfort of the car hammock for your furry companion.
So, whether you’re planning a weekend getaway or a trip to the veterinarian, consider making your own DIY dog car seat cover. With a few materials, measurements, and a little creativity, you can have a customized and practical solution that keeps your pet safe, your car protected, and your adventures hassle-free.
FAQ
What materials do I need to make a DIY dog car seat cover?
To make a DIY dog car seat cover, you will need acrylic, polyester, polyolefin, or olefin outdoor-safe upholstery fabric with high abrasion and stain resistance, Sunbrella® Acrylic Binding 1” Toast, polyester or polypropylene webbing 1” Black, YKK® Side Release Buckle Black 1”, scissors or the Sailrite® Edge Cordless Hotknife, thread Tex 70 Black Polyester UV, tempered cutting glass for the hotknife, sewing machine, marking pencil, tape measure, Sailrite® Battery Operated Thread Burner, and Sailrite® 1″ Swing-Away Binder.
How do I measure my car for a DIY dog car seat cover?
Measure the length and width of your car’s backseat and the distance from the bottom of the backseat headrest to the bottom of the front seat headrest in a U shape.
How do I finish the edges of the fabric when making a DIY dog car seat cover?
You can finish the edges of the fabric by using a hotknife to seal them or by folding over and sewing them.
How do I attach webbing loops to the fabric when making a DIY dog car seat cover?
Mark the placement of the headrests on the fabric, and sew four webbing loops in a U shape, attaching them to the fabric with a box X stitch.
Can I add buckles to the webbing loops on my DIY dog car seat cover?
Yes, if desired, you can add buckles by attaching them to the ends of the webbing and sewing them together with a box X stitch.
What fabric should I choose for my DIY dog car seat cover?
Choose a fabric with high abrasion resistance and stain resistance to withstand wear and tear from your pet.
How can I add extra padding to my DIY dog car seat cover?
You can sew old towels or polyester batting between two layers of fabric for a double-layered hammock.
Can I share photos of my DIY dog car seat cover?
Yes, please share photos of your finished DIY dog car seat cover in the comments or on social media to inspire others and show off your creativity.